WE'LL BE HAPPY TO HELP, CALL US TODAY!
215-607-6688
Mastering Your Cement Floor Epoxy Coating Project from Start to Finish
Mastering Your Cement Floor Epoxy Coating Project from Start to Finish
Start Your Cement Floor Epoxy Coating Project the Right Way
A cement floor epoxy coating can turn a dusty, stained concrete slab into a hard, seamless surface that is easier to clean and better able to handle tire traffic, foot traffic, oil, and many chemical spills. The result depends far more on preparation than on the gloss of the final coat.
For a lasting installation:
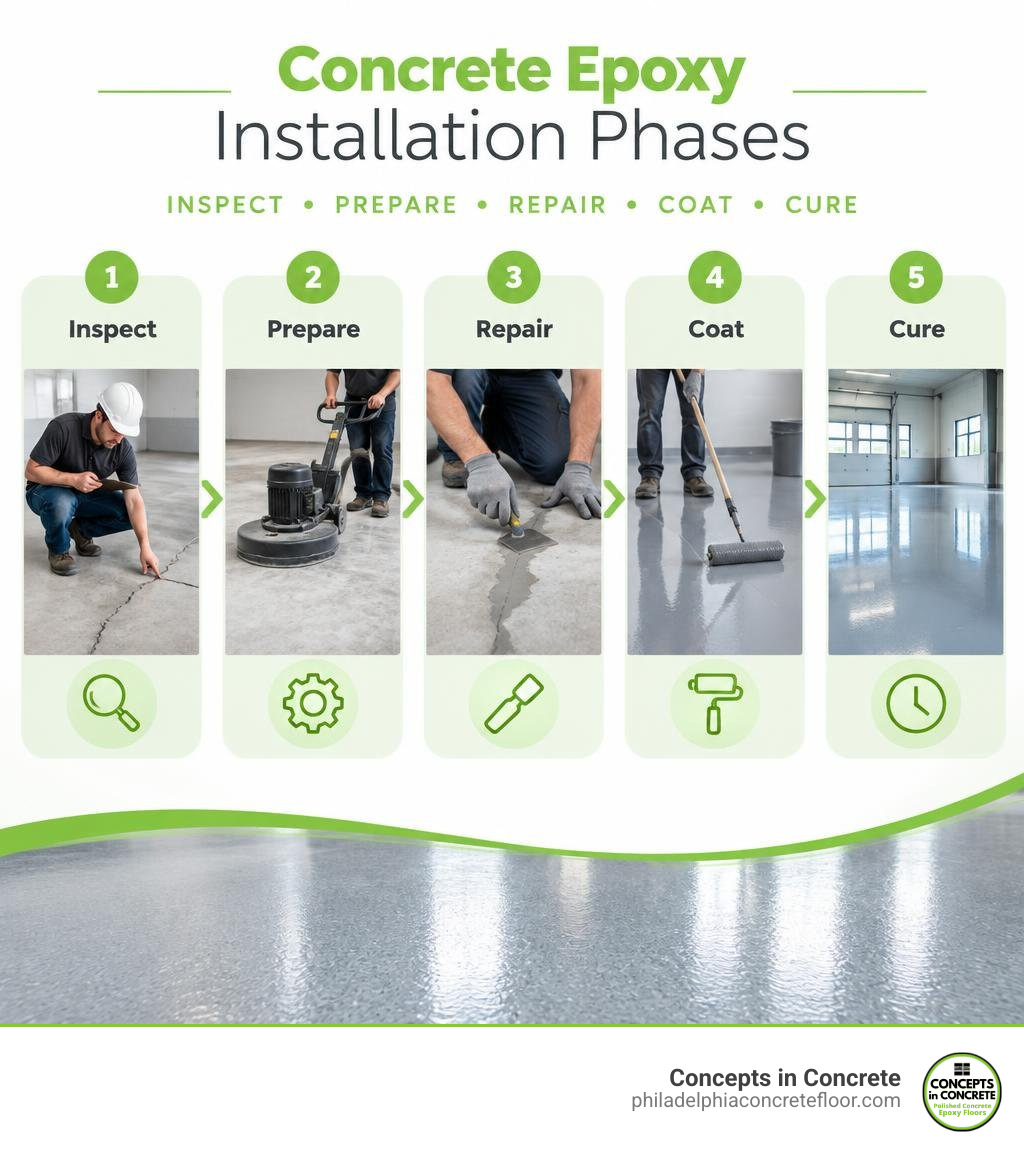
- Inspect and repair cracks, weak concrete, and failed old coatings.
- Remove oil, dirt, and surface contaminants completely.
- Create a surface profile, usually by mechanical grinding, so the epoxy can bond.
- Mix and apply the resin exactly as specified, working within its limited pot life.
- Allow full cure time before returning vehicles, equipment, or heavy loads to the floor.
Epoxy is not ordinary concrete paint. A true two-part system combines resin and hardener to form a tough plastic-like coating. It can provide strong chemical resistance and a non-porous finish, but poor cleaning, hidden moisture, or rushed mixing can cause peeling and bubbles.
For homeowners and businesses in Philadelphia, Bucks County, and nearby South Jersey communities, local conditions such as seasonal temperature swings, road-salt residue, garage moisture, and heavy vehicle use make proper slab evaluation especially important. Whether you manage a warehouse or want a garage floor that stands up to hot tires and oil drips, this guide walks through the choices and steps that matter most.
Understanding Concrete Epoxy and Its Core Advantages
To understand why a resin system outperforms standard floor paint, we have to look at the chemistry beneath your feet. Traditional paint dries purely through evaporation, leaving behind a thin latex or oil film that easily scuffs, chips, and blisters under heat. In contrast, a two-part epoxy coating relies on a thermosetting chemical reaction between an epoxide resin (Part A) and a polyamine hardener (Part B). When combined, these compounds cross-link into a rigid, non-porous polymer matrix that mechanically locks into the open pores of the concrete slab.

This cross-linked structure gives the floor exceptional compressive and flexural strength. In fact, a high-solids industrial epoxy can be up to 200% harder than the bare concrete slab beneath it! That strength translates into distinct practical benefits:
- Resistance to Hot-Tire Pickup: When vehicle tires run on hot asphalt, they expand and heat up. If you park on low-grade paint or poorly bonded coatings, the cooling rubber contracts and literally pulls the coating right off the slab. High-tensile resin bonds eliminate this failure mode entirely.
- Impervious Chemical Barrier: Motor oil, brake fluid, battery acid, road salts, and household detergents bead up on the surface rather than soaking into porous concrete, making cleanup effortless.
- Enhanced Light Reflectivity: A high-gloss clear or pigmented finish can increase ambient light reflectivity by up to 400%, brightening dark work bays and basements without additional lighting fixtures.
- Seamless Hygiene: By eliminating joints, cracks, and concrete dust, these systems prevent mold, mildew, and bacteria from taking hold.
Discovering all the practical epoxy garage floor coating benefits helps clarify why property owners choose these systems over temporary sealers. When properly installed and maintained, you can read our breakdown on how long epoxy floors last to see why industrial-grade applications regularly endure 15 to 20 years of daily use.
Choosing the Ideal Cement Floor Epoxy Coating System
Not every resin system behaves the same way. Selecting the right product depends on your budget, environmental exposure, and how much physical abuse the floor must endure.
| Feature / Metric | 100% Solids Epoxy | Water-Based Epoxy | Solvent-Based Epoxy |
|---|---|---|---|
| Solids Content by Volume | 100% (No shrinkage) | 30% – 50% | 60% – 70% |
| Dry Film Thickness (DFT) | 10–30+ mils per coat | 2–4 mils per coat | 3–6 mils per coat |
| VOC Levels & Odor | Very Low to Zero VOC; Ultra-low odor | Low VOC; Mild odor | High VOC; Strong solvent fumes |
| Pot Life Window (at 70°F) | 20–30 minutes (Fast reaction) | 60–120 minutes (Forgiving) | 30–45 minutes |
| Hot-Tire Resistance | Exceptional | Moderate to Poor | High |
| Best Application Setting | Heavy industrial, commercial, quality garages | Light residential basements, DIY entry-level | Industrial facilities with explosion-proof venting |
Comparing Cement Floor Epoxy Coating Formulations
The three primary categories differ fundamentally in how they cure and what remains on your floor after drying:
- 100% Solids Epoxy: This represents the true professional gold standard. Because there is no water or solvent carrier to evaporate, what goes down wet stays at that exact thickness when dry. A 10-mil wet film cures to a full 10-mil protective shell. It offers maximum chemical resistance, high build thickness, and virtually zero VOC fumes, making it ideal for occupied homes and sensitive commercial environments.
- Water-Based Formulations: Often found in off-the-shelf DIY consumer kits, these contain 30% to 50% epoxy solids suspended in water. As the water evaporates during drying, the film shrinks dramatically, leaving behind a thin layer (often under 3 mils). While easy to roll out and clean up with soap and water, they are far more susceptible to hot-tire delamination under heavy vehicles.
- Solvent-Based Systems: These systems use hydrocarbon solvents to carry the resin. While they penetrate concrete effectively and yield high durability, their high volatile organic compound (VOC) levels create potent, hazardous fumes that require active ventilation and vapor respirators.
For high-demand spaces, a complete pure epoxy floor coating kit provides the high-build durability and chemical resistance needed for larger commercial or multi-vehicle footprints.
Calculating Coverage, Thickness, and Decorative Finishes
Accurate coverage calculations require accounting for both the square footage and the mechanical profile (roughness) of the slab. Rougher concrete absorbs significantly more liquid primer than dense, hand-troweled slabs.
Beyond pure function, decorative enhancements allow you to tailor aesthetics and safety:
- Vinyl Color Flakes (Chips): Broadcast into wet base coats to create granite-like patterns while helping hide minor concrete imperfections.
- Metallic Pigments: Dispersed within clear resins to yield three-dimensional, pearlescent swirls that look like marble or flowing liquid metal.
- Quartz Broadcast: Crushed colored quartz embedded in heavy-duty resin for maximum impact durability and natural texture.
- Anti-Slip Aggregates: Adding aluminum oxide grit (typically #46 or #60 mesh) into the final topcoat creates a skid-resistant profile, crucial for wet bays, ramps, and commercial wash areas.
Combining these finishes with high-durability polymers allows you to design stunning epoxy floors and decorative concrete for garages and basements that match your home or brand styling.
Comprehensive Step-by-Step Preparation and Application Guide
A successful resin installation is roughly 80% surface preparation and 20% application. If you cut corners on the substrate, even the most expensive resin will peel.
Concrete Surface Preparation and Mechanical Profiling
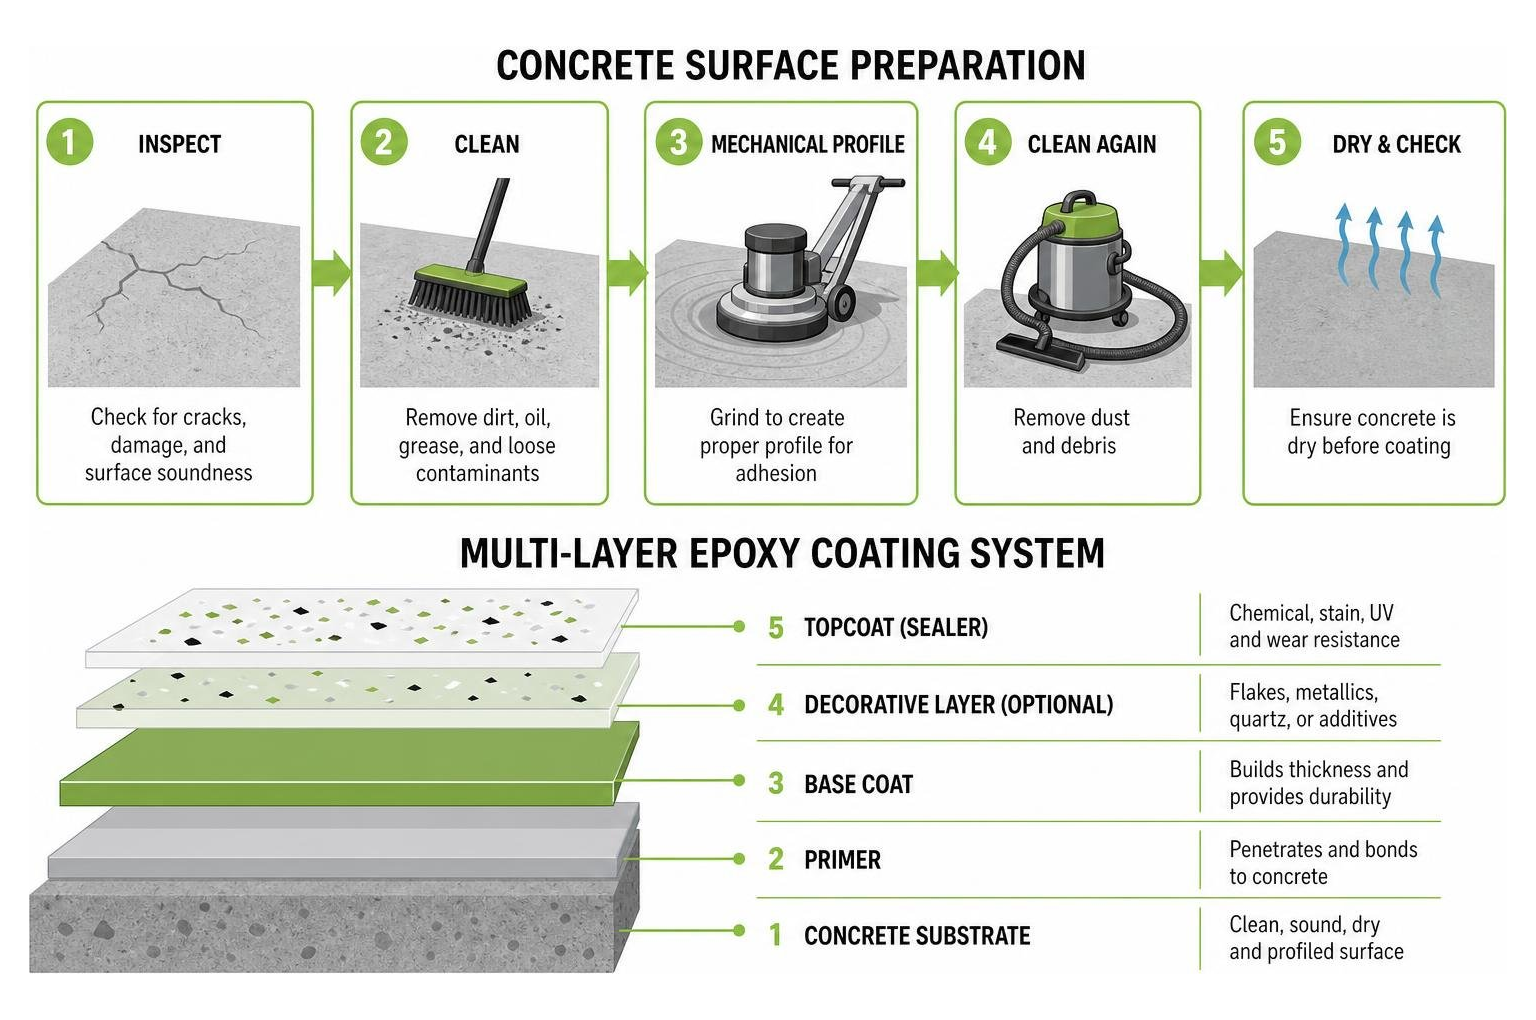
Before any resin touches the slab, the concrete must be clean, dry, sound, and profiled.
- Moisture Vapor Testing: Concrete behaves like a sponge. Hydrostatic pressure from below can push moisture through the slab, causing the coating to blister. Test your floor with a calcium chloride kit or relative humidity probe. If moisture vapor emission rates exceed 3 lbs / 1,000 sq ft / 24 hours, you must apply a dedicated moisture-mitigation epoxy primer first.
- Degreasing: Saturated oil and grease spots prevent resin penetration. Scrub contaminated areas using an industrial enzymatic degreaser and hot water until water dropped on the concrete wets out rather than beading up.
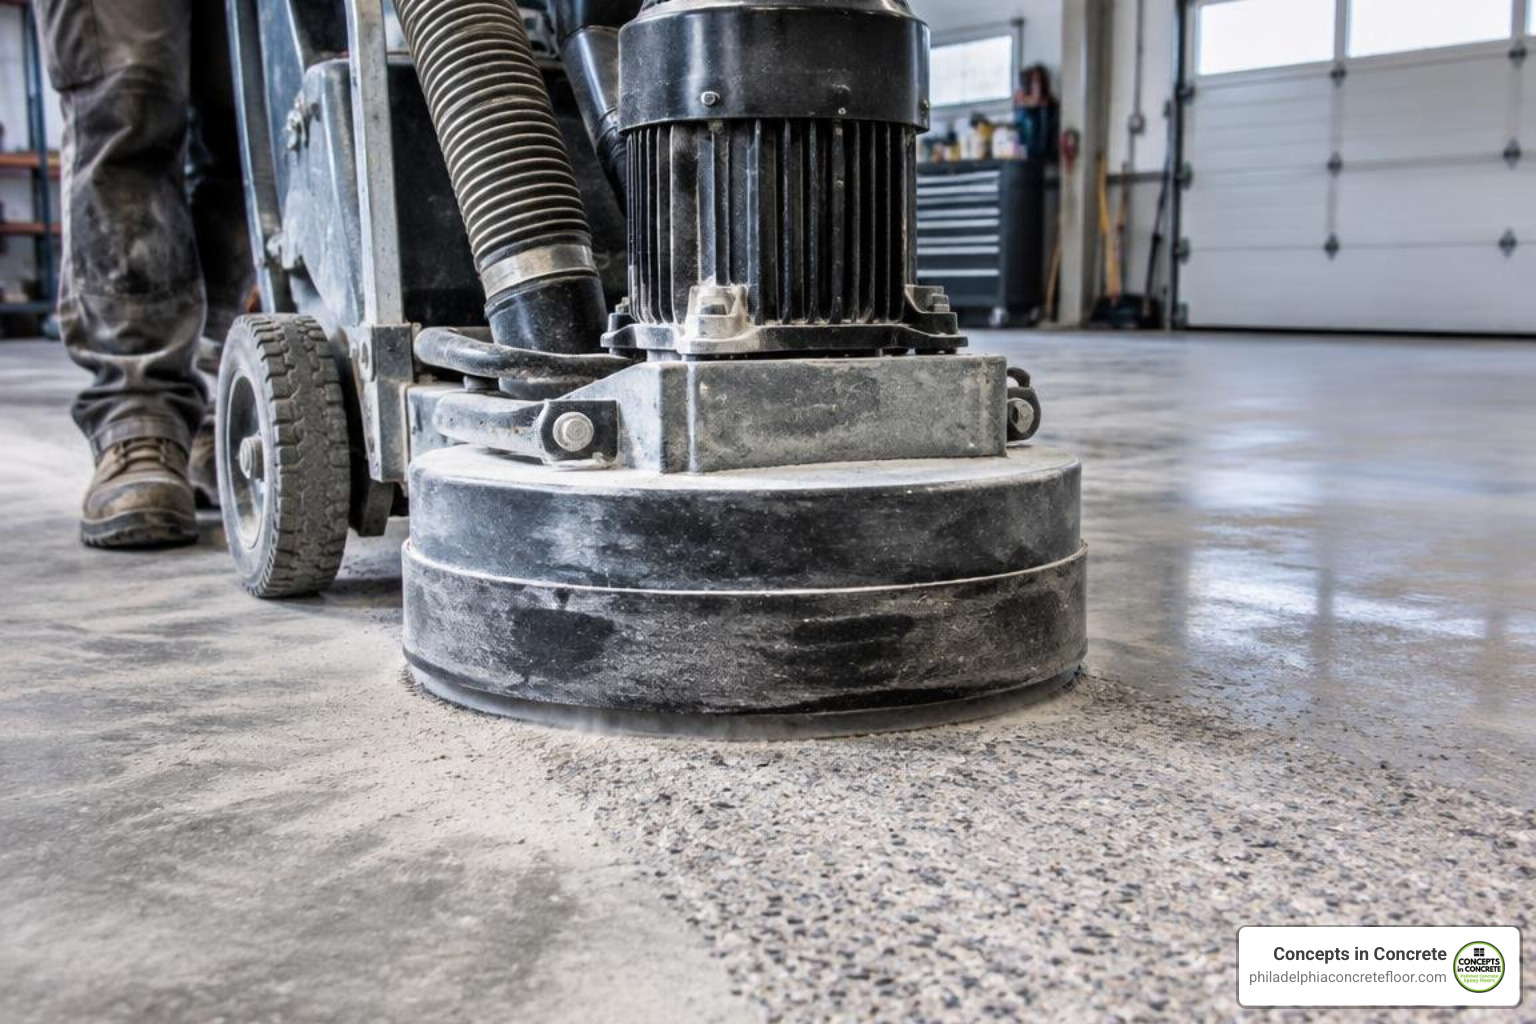
- Mechanical Profiling (Diamond Grinding): Acid etching with muriatic or phosphoric acid is often marketed for DIY projects, but it carries severe limitations—it struggles to etch dense concrete evenly, leaves acid residues, and introduces massive amounts of water into the slab. True professional adhesion requires mechanical diamond grinding or shot blasting to achieve an International Concrete Repair Institute (ICRI) Concrete Surface Profile (CSP) of 2 to 3 (which feels like 80-grit sandpaper).
- Crack and Spall Repair: Fill expansion joints, divots, and structural cracks using a two-part structural epoxy gel or polyurea patch material. Once cured, grind the repairs flush with the surrounding concrete. Thorough concrete repair ensures an uninterrupted, mirror-smooth base layer.
Essential Equipment and Site Readiness
Gather all necessary tools before opening a single can, because once components A and B meet, the chemical countdown begins:
- Variable-speed heavy-duty drill and spiral mixing paddle
- Calibrated notched squeegees for uniform thickness distribution
- 3/8-inch lint-free, shed-resistant roller covers with heavy-duty frames
- Spiked shoe covers (allowing you to walk onto wet resin to broadcast flake or back-roll)
- Nitrile gloves, eye protection, and organic vapor half-face respirators
- Painter’s tape and heavy plastic sheeting to mask perimeter walls and thresholds
Executing the Cement Floor Epoxy Coating Application
Follow this precise workflow to ensure flawless cross-linking and a long-lasting finish:
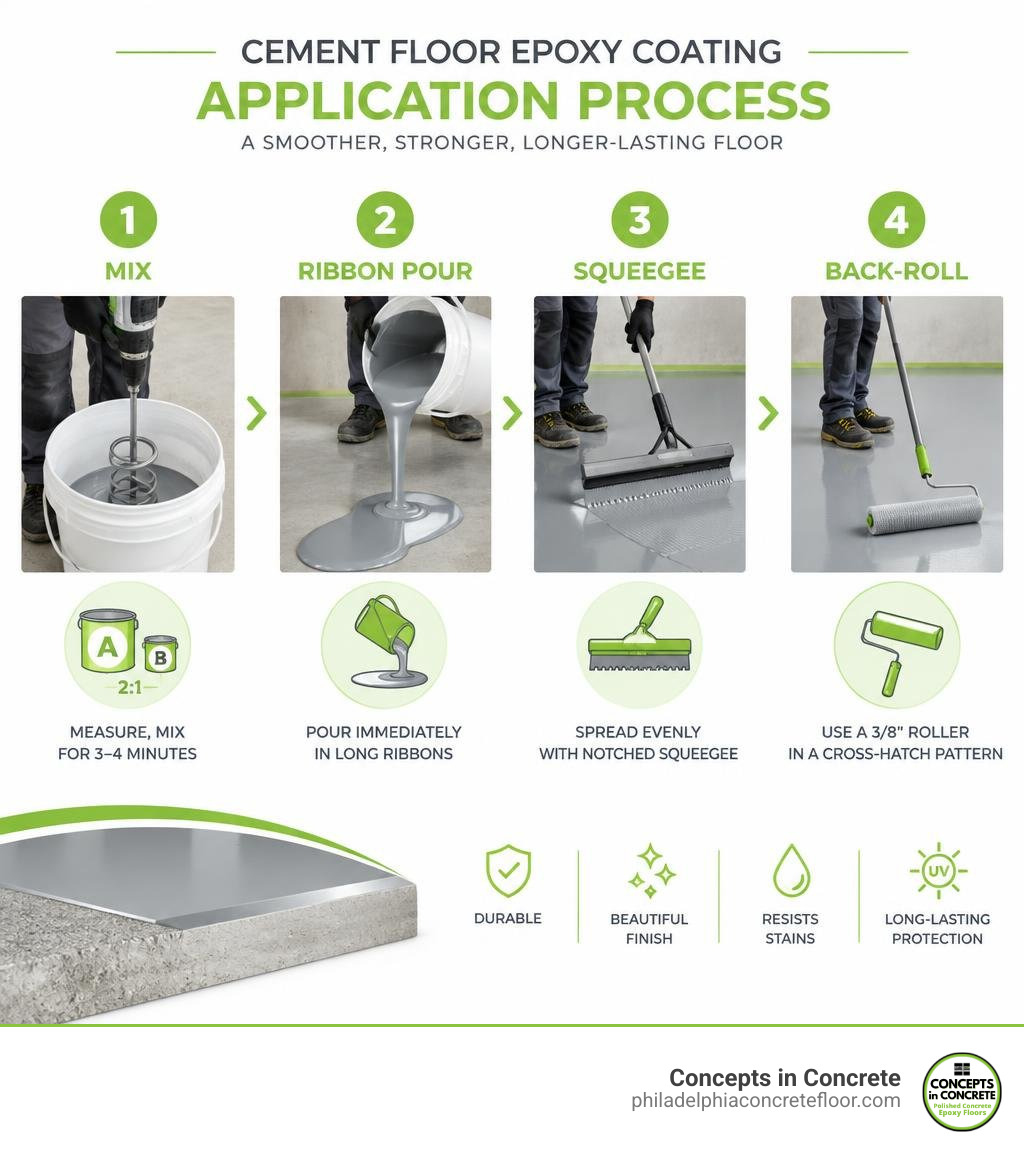
- Strict Ratio Mixing: Pour Part A and Part B into a clean mixing bucket at the exact manufacturer-specified ratio (commonly 2:1 or 4:1 by volume). Mix using a mechanical paddle at low speed (300–450 RPM) for 3 to 4 full minutes. Avoid high speeds, which whip air bubbles into the matrix.
- Immediate Ribbon Pouring: Never leave mixed epoxy sitting in the bucket! The mass accelerates exothermic heat buildup, drastically shortening your pot life. Immediately pour the blended resin onto the floor in long ribbons.
- Squeegee and Cross-Rolling: Spread the material evenly using your notched squeegee, then use a 3/8-inch roller to back-roll in a perpendicular cross-hatch pattern ($X$ and $Y$ axis) to level out ridges.
- Flake Broadcast (Optional): If applying decorative flake, throw handfuls high into the air within 10 to 15 minutes of rolling, allowing the chips to rain down evenly into the wet resin until achieving your desired density.
- Protective Topcoat: After an overnight cure (12–16 hours), scrape off loose flakes, vacuum thoroughly, and apply a clear, non-yellowing aliphatic urethane topcoat for UV stability, stain resistance, and scratch protection.
When comparing your options, reviewing epoxy flooring costs in 2026 helps balance material investments against long-term performance.
Avoiding Critical Installation Mistakes
Even experienced DIYers can encounter avoidable failures if they overlook these common issues:
- Outgassing Pinholes: Applying resin on a warming concrete slab causes expanding air trapped in concrete pores to push upward, creating tiny bubbles. Coat your floors during late afternoon or evening when ambient temperatures are falling.
- Improper Ratios & Incomplete Mixing: Guessing component ratios or failing to scrape bucket walls causes sticky, soft spots that will never fully harden.
- Exceeding Pot Life: Spreading epoxy that has already begun to thicken yields roller marks, poor leveling, and weak bonding strength.
- Moisture Delamination: Applying coatings over a damp slab or unaddressed hydrostatic pressure leads to trapped vapor blisters that eventually pop and peel.
Frequently Asked Questions About Epoxy Concrete Finishes
Can epoxy be applied directly over existing paint or old coatings?
We strongly advise against applying high-performance epoxy directly over old paint or mystery coatings. A coating is only as strong as what lies beneath it; if the underlying paint softens, blisters, or loses adhesion, your new epoxy will peel away with it.
Furthermore, strong solvents in industrial epoxies can soften and wrinkle old acrylic or latex layers. The best practice is to grind the slab down to bare concrete. If an old coating is exceptionally sound and you wish to recoat, thoroughly sand the surface to remove all gloss, vacuum the dust, and perform a cross-hatch tape adhesion test on a small test patch before full application.
How long does an epoxy floor take to cure before vehicle traffic?
Curing depends on ambient temperature, humidity, and the chemical system used:
- Tack-Free / Flake Scrape Window: 8 to 12 hours.
- Light Foot Traffic: 16 to 24 hours (at 70°F / 21°C).
- Heavy Furniture & Storage Placement: 48 to 72 hours.
- Full Vehicle Traffic & Full Chemical Cure: 5 to 7 full days.
Pro tip: Cool temperatures below 55°F dramatically slow down the cross-linking reaction, while high heat accelerates it. Never park a hot vehicle on a newly coated floor before the full 7-day chemical cure window has passed.
How do you properly clean and maintain epoxy-coated concrete?
Caring for an epoxy floor is remarkably straightforward:
- Routine Sweeping: Use a soft-bristle broom or commercial microfiber dust mop daily or weekly to remove loose dirt and abrasive grit that could dull the gloss.
- Damp Mopping: Clean with warm water and a pH-neutral cleaner (such as simple dish soap or dedicated floor cleaners). Avoid harsh citrus-based cleaners, vinegar, or acidic solutions, which can chemically etch and haze the clear topcoat over time.
- Spill Management: Wipe up battery acid, brake fluid, and caustic chemicals promptly. While the surface is chemically resistant, extended exposure can eventually stain or soften the protective finish.
Conclusion
A well-executed cement floor epoxy coating delivers a showroom-grade finish that resists chemicals, heavy impact, and relentless vehicle traffic. Achieving those results requires meticulous surface profiling, precise mixing ratios, and high-quality resin materials.
Choosing an experienced professional installer can protect that investment over the long term. A seasoned team can identify moisture risks, weak concrete, contamination, and repair needs before coating begins—problems that commonly lead to premature peeling or delamination when they are missed. Professional installation also brings specialized grinding equipment, product-specific application knowledge, and a documented scope of work, all of which help create a more consistent, durable finish. Before work begins, ask for clear written details on the materials, preparation process, maintenance expectations, and any applicable workmanship or manufacturer warranty so you know what is covered and how to protect the floor.
At Concepts in Concrete, we bring over two decades of precision craftsmanship to residential garages, commercial showrooms, and industrial facilities across Philadelphia, Bucks County, and South Jersey. Our team evaluates each slab, recommends an epoxy system suited to the space, and handles the preparation work that gives a decorative or heavy-duty floor its best chance of long-term performance.
Explore our professional epoxy garage floor coatings to transform your space with a custom, durable floor built to last.
Call us today at 215-607-6688 or Contact Us by email
© 2004-2026 Concepts in Concrete Bristol PA | All Rights Reserved | Powered by Rettig Digital